Sour beer is all the rage among craft beer lovers. Although this is historically the oldest beer style, it is safe to say that modern-day sour beers do not come cheap. The good news is that you can brew your own tart-tasting booze.
The addition of wild bacteria and yeast gives this beer the characteristic twangy taste. Aging the alcohol for months or sometimes years adds to the beer’s dark and wild flavor and aroma.
We love a little tart to our beer and so we created this guide to show you how to brew sour beer right from your kitchen. We’ll also dish out some tips on how to make your brewing process a success.

Tools and supplies for brewing sour beer
- 5-gallon brew kettle
- Primary and secondary plastic fermenter bubbler
- Long-handled spoon- stainless steel or plastic
- Kitchen timer
- Kitchen thermometer
- Ice
- Storage bottles
Simple sour beer recipe
- 1 pct Omega Yeast Lacto Blend (OYL- 605)
- 1pkt White Labs WLP001 (California Ale Yeast)
- I lb pilsner malt grain
- 5 lb wheat malt grain
- 10 gallons distilled water
Step-by-Step Guide To Brew Sour Beer
Follow these steps to make your own sour beer.
Step 1: Prepare the mash
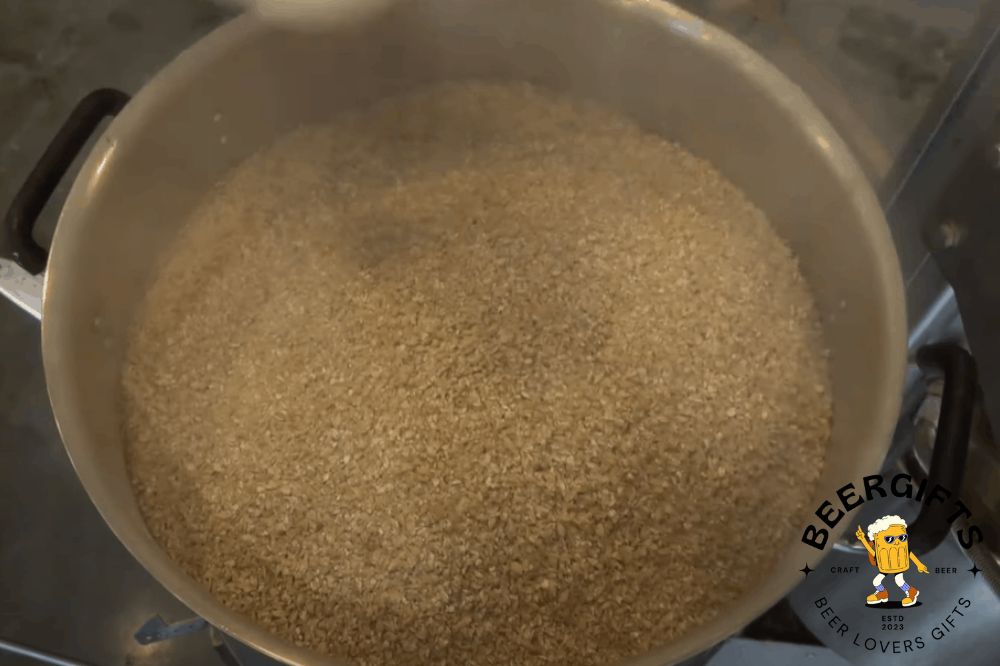
For this recipe, we will be using whole grains, which include wheat malt and pilsner malt. You can use a pre-made mash extract and the results will be more or less the same.
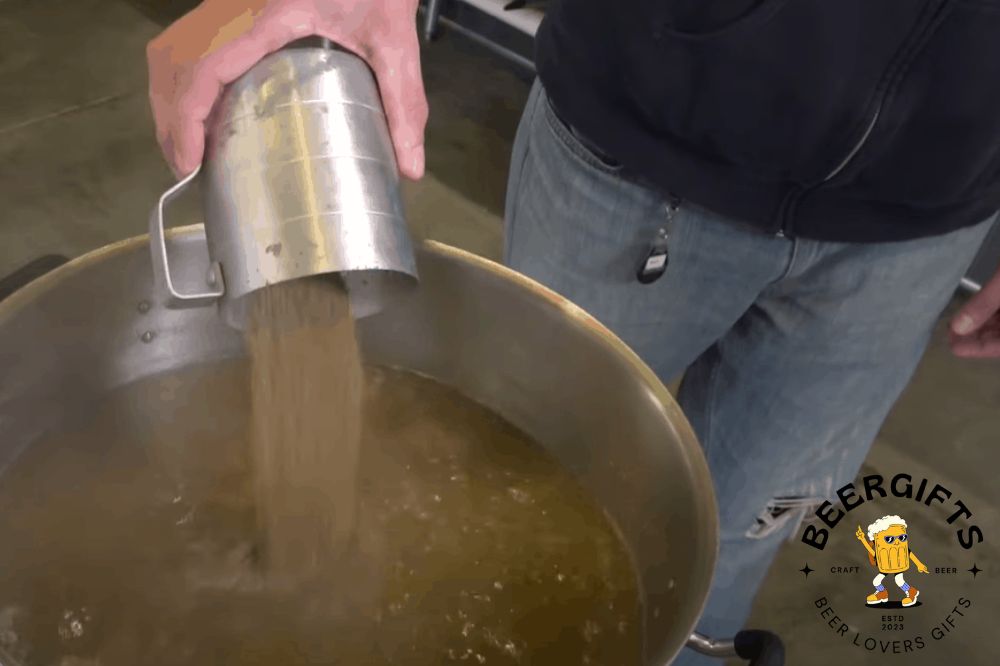
So, let’s get started with the mashing process. Fill up a 5-gallon brew kettle with water and heat to 1700F. Then, add the crushed wheat malt and pilsner malt to a mash tun.
You may add rice hulls to prevent the mush from clumping up and sticking to the bottom of the tun. But, this step is optional and you can skip it if you do not have rice hulls.
Stir in the grains until they are covered by water. Adding grain will lower the temperature but your target temperatures should be between 150OFand 15400F. Mash the grains for 60 minutes at this temperature range.
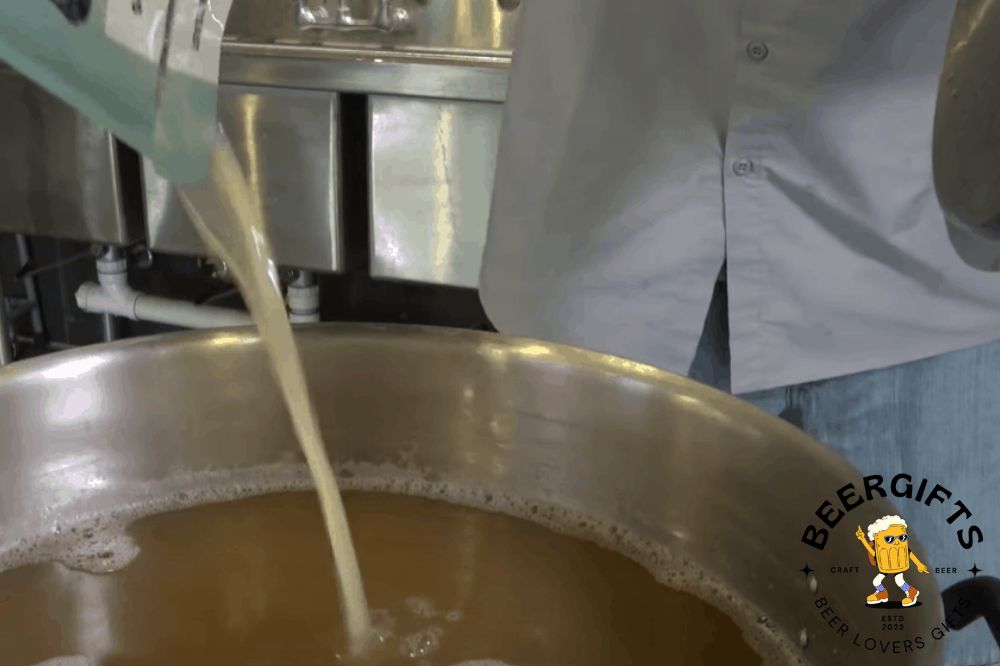
Step 2: Heat the sparge water
As the mash-in progresses, you should prepare the sparge water. Sparging is the process of ‘cleaning’ the wort. Wort is simply the liquid product that is separated from the spent grain.
In a separate brew kettle, heat the sparge water to 200o F. Our goal is to brew about 5 gallons of beer so be sure to heat enough water to top up your wort with.
Now, you will do the actual sparging or cleansing. First, transfer half a gallon of wort to a bucket or other container and then pour it back to the mash tun. You can see how this process is done here.
Next, slowly pour the 200OF sparging water over the grains. Then, drain the cleaned wort from the turn. This process of sparging and draining out the wort can take up to one hour. Rushing it along will interfere with the gravity and quality of the beer in the end.
Pro Tip: If you want to spend too much time sparging using water, you can clarify your wort by adding kettle finings such as Whirlfloc to the wort about 15 minutes before the boil ends.
Step 3: Boil the wort

After you have collected enough wort to produce about 5 gallons of beer, you can move on to the boiling phase. Boiling pasteurizes the wort to kill any harmful microbes that may interfere with the quality and safety of the final beer product.
Set a timer for 60 minutes and, in the crockpot, bring your wort to a boil. If you are using kettle finings to clarify the wort, add them 15 minutes before the end of the boil.
After the 60 minutes boil, transfer the wort to your primary fermenter bubbler vessel and allow the wort to cool to 95oF before adding yeast to the liquid. Adding yeast to hot wort will kill the yeast enzymes and so fermentation will not take place.
You can use a wort chiller to cool the wort fast but if you do not have a chiller, you can use a simple ice bath in your kitchen sink.
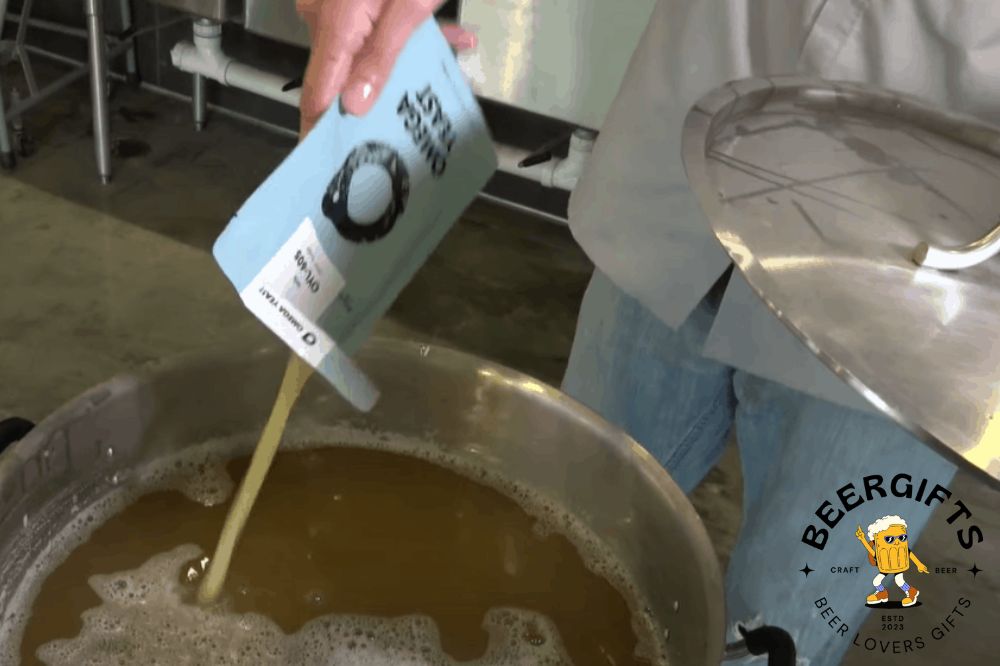
Step 4: Add Lactobacillus to the wort
What makes sour beer sour is the addition of two types of bacteria and one type of yeast to the wort. The first bacterium is lactobacillus, which converts sugar into lactic acid. The lactic acid adds acidity to beer, giving it that twangy flavor.
The other bacterium is Pediococcus, which also adds acidity to beer. The longer a beer containing this microbe is aged, the sourer the beer gets.
Now that you know about the types of bacteria used in brewing sour beer, let’s get back to the brewing process. Once the wort has cooled, add a packet of the Lactobacillus. Then, store the fermenter vessel in a warm, quiet spot for 12-18 hours.
Lactobacillus thrives best in temperatures of roughly 85oF. It is important to maintain this temperature range for the bacteria to do its job of souring the wort. If your kitchen or brewing area is cold, we recommend wrapping the fermenter vessel containing the wort with something warm like an insulating wrap, which will trap heat.
Step 5: Add the brewer’s yeast
It is now time to pitch the wort using the usual brewer’s yeast. First, shake the fermenter vessel containing the wort for about 10 minutes to oxygenate the wort. Oxygenation also creates a conducive environment for the brewer’s yeast to thrive and kick start the fermentation process.
Before adding the yeast, first activate it by mixing the yeast with ¾ cups of water and setting it aside for 10-15 minutes.
Pour the yeast into the fermenter vessel, stir, and seal the vessel. Return the fermenter vessel to a warm and quiet spot and allow it to ferment for about two weeks or until the signs of fermenting are complete.
You will know that fermentation has come to an end when no more bubbles are coming to the surface of the wort. At this point, the beer will have a sour flavor that can range from lightly twangy to acutely bitter.
Go ahead, it is safe to taste the beer now. If it has a strong rotten smell, you will need to brew the beer again because we are not aiming for this aroma or flavor. Don’t get discouraged if your sour beer doesn’t come out quite right the first time. You will need to practice a few more times to finally come up with the perfect brew.
Step 6: Add Brettanomyces
Brettanomyces, also known as Brett, is a wild yeast that helps to balance the sourness of the beer by bringing a more earthy flavor.
What is important to note here is that we will need to prevent the fermented beer from oxygen exposure as much as possible. Oxidation is the enemy of beer—when beer is exposed to oxygen loses its fizzy mouthfeel and becomes flat.
Transfer the beer to a carboy. Carboys are airtight and they minimize the flow of oxygen into the vessel. Add the Brettanomyces yeast and completely fill the carboy so that there is no space inside the vessel for air to get in. Be sure to lock up the carboy using its respective airlock and bung.
Pro Tip: Choose a Brettanomyces strain with the qualities you would want in your beer. Common flavor options include funky, tropical, earthy, sweaty, and fruity just to mention a few. It all really depends on your palate.
Step 7: Store the beer for fermentation
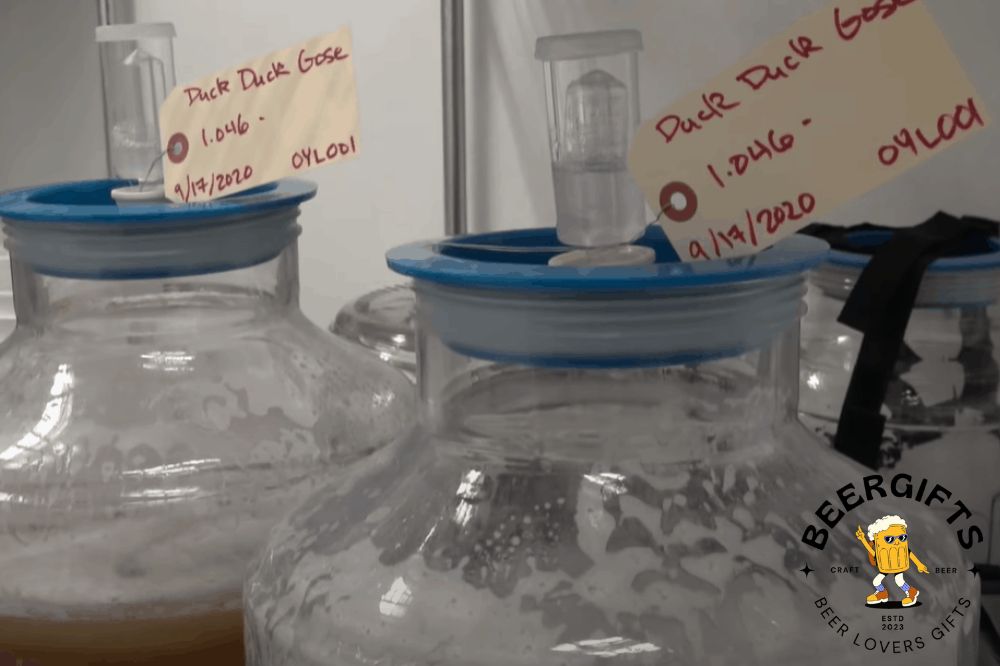
Once you add the Brett, what is left is to wait for fermentation and aging to take place. You may need to age the beer for 3 to 6 months or until fermentation is complete. After a few weeks, you may notice bubbles rising in the airlock. This shows that fermentation is underway.
Once the bubbles stop rising and the beer takes on a darker color, it shows that the Brett yeast is spent and that the beer will clear out soon. At this point, you can sample the beer by pouring some from the carboy.
If you are happy with the taste of the beer, you can keg it, carbonate it, or store it in bottles ready to chill in the freezer. If you would like to know how to keg and carbonate your beer, check out this helpful video tutorial.
Extra Tips
- The bacteria used to ferment sour beer are also contaminants that will spoil the normal, regular beer. To avoid cross-contamination, use a different set of equipment for making sour beer and for regular, non-sour beer.
- Before bottling, take several gravity readings of the beer over a couple of weeks. Wait to get identical gravity readings before priming the beer. Bottling beer at low gravity can cause potentially explosive over-carbonation.
- If for some reason, you do not have access to the lactic acid bacteria, you can use leftovers from unpasteurized sour beer to act as a source of lactic acid to ferment the newly made beer.
Summary
Congratulations on making your first batch of sour beer!
Brewing sour beer is different from the normal brewing process in that in addition to a basic brewer’s yeast, you will need to pitch strains of bacteria to sour the beer.
Traditional methods of souring beer can take months and even years of aging. But there is really no reason to wait that long to sample this popular thirst-quenching, tarty beverage.
The use of Lactobacillus helps to shorten the fermentation process, allowing you to enjoy your sour beer a month or so after brewing, which is not bad at all. Cheers!

Interesting content thanks for this looking forward to more blogs like this.